nDoroKanjeng
-
Content Count
272 -
Joined
-
Last visited
Files posted by nDoroKanjeng
-

Battle Realms Windows XP Boot Screens (SP2)
By nDoroKanjeng in Miscellaneous
The ntoskrnl.exe from Windows XP without installed Service Pack (Non SP) and with installed Service Pack 1 (SP1) or Service Pack 2 (SP2) are not compatible and reverse. This means if you using a wrong, not to your system corresponding ntoskrnl.exe, the Windows XP will hang or crash while booting! Once again, this ntoskrnl.exe is for Windows XP with installed Service Pack 2 (SP2).
Wrong manipulating on the boot.ini or a wrong ntoskrnl.exe can damage your system and can make it unbootable!
Don't forget to make a backup copy of your boot.ini and ntoskrnl.exe files!
You can use one of the following method. Please read the instructions carefully to install :
<<Method boot.ini>>
1. Extract the ntoskrnl.exe to a directory other than %windir%\system32 (most likely C:\windows\system32 ), for example C:\Temp
2. Rename the ntoskrnl.exe in your C:\Temp directory to another name, in this example to brntoskrnl.exe
3. Move or copy your brntoskrnl.exe from your C:\Temp directory to the %windir%\system32 directory (most likely C:\windows\system32)
4. Modify your boot.ini file by going to the Start Menu / Control Panel / System / Advance tab / Startup and Recovey / Settings button / Edit
or...
Edit boot.ini using notepad. You can find it in the system root (normally C:\)
(note: the boot.ini file normally has hidden and system attributes, open Tools->Folder Options menu in Windows Explorer, select VIEW tab and :
- tick 'Display the contents of system folders'
- tick 'Show hidden files and folders'
- untick 'Hide protected operating system files (Recommended)'
You should now be able to see/open boot.ini using notepad from the system root (C:\) )
5. In the boot.ini file you have to copy the line you use normally use for boot (this is usually the last line, e.g. : 'multi(0)disk(0)rdisk(0)partition(1)\WINDOWS="Microsoft Windows XP Professional" /noexecute=optin /fastdetect' and paste this copy underneath.
At the end of this new line, add this text: /KERNEL=brntoskrnl.exe (The name "brntoskrnl.exe" should be whatever you renamed the ntoskrnl.exe to when you extracted it to C:\Temp {in step 2})
6. Change the OS name whatever you want, for example:
multi(0)disk(0)rdisk(0)partition(1)\WINDOWS="Microsoft Windows XP Professional" /noexecute=optin /fastdetect /KERNEL=brntoskrnl.exe
becomes...
multi(0)disk(0)rdisk(0)partition(1)\WINDOWS="Microsoft Windows XP Battle Realms Edition" /noexecute=optin /fastdetect /KERNEL=brntoskrnl.exe
Example of the modified boot.ini :
[boot loader]
timeout=30
default=multi(0)disk(0)rdisk(0)partition(1)\WINDOWS
[operating systems]
multi(0)disk(0)rdisk(0)partition(1)\WINDOWS="Microsoft Windows XP Professional" /noexecute=optin /fastdetect
multi(0)disk(0)rdisk(0)partition(1)\WINDOWS="Microsoft Windows XP Battle Realms Edition" /noexecute=optin /fastdetect /KERNEL=brntoskrnl.exe
7. Save and exit the boot.ini file
8. Reboot your computer and you should get an option as to which OS you wish to boot into, "Microsoft Windows XP Professional" and "Microsoft Windows XP Battle Realms Edition"
9. Done!!!
<<Method Save Mode>>
1. Reboot your computer into Safe Mode (press F8 continuously before the loading of Windows XP until a multi-boot Screen appear then select Safe Mode as your choice)
2. Overwrite the file %windir%\system32\ntoskrnl.exe (most likely C:\windows\system32\ntoskrnl.exe), which should have been backed up, with the extracted ntoskrnl.exe
3. Reboot your computer as you normally would and you should see the boot picture of Battle Realms while loading of Windows XP
4. Done!!!
Disclaimer :
I'm not responsibility for any damage and resulting problems of your manipulations. Use this boot screens at your own risk!
273 downloads
0 comments
Submitted
-
Battle Realms Windows XP Boot Screens (SP1)
By nDoroKanjeng in Miscellaneous
The ntoskrnl.exe from Windows XP without installed Service Pack (Non SP) and with installed Service Pack 1 (SP1) or Service Pack 2 (SP2) are not compatible and reverse. This means if you using a wrong, not to your system corresponding ntoskrnl.exe, the Windows XP will hang or crash while booting! Once again, this ntoskrnl.exe is for Windows XP with installed Service Pack 1 (SP1).
Wrong manipulating on the boot.ini or a wrong ntoskrnl.exe can damage your system and can make it unbootable!
Don't forget to make a backup copy of your boot.ini and ntoskrnl.exe files!
You can use one of the following method. Please read the instructions carefully to install :
<<Method boot.ini>>
1. Extract the ntoskrnl.exe to a directory other than %windir%\system32 (most likely C:\windows\system32 ), for example C:\Temp
2. Rename the ntoskrnl.exe in your C:\Temp directory to another name, in this example to brntoskrnl.exe
3. Move or copy your brntoskrnl.exe from your C:\Temp directory to the %windir%\system32 directory (most likely C:\windows\system32)
4. Modify your boot.ini file by going to the Start Menu / Control Panel / System / Advance tab / Startup and Recovey / Settings button / Edit
or...
Edit boot.ini using notepad. You can find it in the system root (normally C:\)
(note: the boot.ini file normally has hidden and system attributes, open Tools->Folder Options menu in Windows Explorer, select VIEW tab and :
- tick 'Display the contents of system folders'
- tick 'Show hidden files and folders'
- untick 'Hide protected operating system files (Recommended)'
You should now be able to see/open boot.ini using notepad from the system root (C:\) )
5. In the boot.ini file you have to copy the line you use normally use for boot (this is usually the last line, e.g. : 'multi(0)disk(0)rdisk(0)partition(1)\WINDOWS="Microsoft Windows XP Professional" /fastdetect' and paste this copy underneath.
At the end of this new line, add this text: /KERNEL=brntoskrnl.exe (The name "brntoskrnl.exe" should be whatever you renamed the ntoskrnl.exe to when you extracted it to C:\Temp {in step 2})
6. Change the OS name whatever you want, for example:
multi(0)disk(0)rdisk(0)partition(1)\WINDOWS="Microsoft Windows XP Professional" /fastdetect /KERNEL=brntoskrnl.exe
becomes...
multi(0)disk(0)rdisk(0)partition(1)\WINDOWS="Microsoft Windows XP Battle Realms Edition" /fastdetect /KERNEL=brntoskrnl.exe
Example of the modified boot.ini :
[boot loader]
timeout=30
default=multi(0)disk(0)rdisk(0)partition(1)\WINDOWS
[operating systems]
multi(0)disk(0)rdisk(0)partition(1)\WINDOWS="Microsoft Windows XP Professional" /fastdetect
multi(0)disk(0)rdisk(0)partition(1)\WINDOWS="Microsoft Windows XP Battle Realms Edition" /fastdetect /KERNEL=brntoskrnl.exe
7. Save and exit the boot.ini file
8. Reboot your computer and you should get an option as to which OS you wish to boot into, "Microsoft Windows XP Professional" and "Microsoft Windows XP Battle Realms Edition"
9. Done!!!
<<Method Save Mode>>
1. Reboot your computer into Safe Mode (press F8 continuously before the loading of Windows XP until a multi-boot Screen appear then select Safe Mode as your choice)
2. Overwrite the file %windir%\system32\ntoskrnl.exe (most likely C:\windows\system32\ntoskrnl.exe), which should have been backed up, with the extracted ntoskrnl.exe
3. Reboot your computer as you normally would and you should see the boot picture of Battle Realms while loading of Windows XP
4. Done!!!
Disclaimer :
I'm not responsibility for any damage and resulting problems of your manipulations. Use this boot screens at your own risk!
84 downloads
0 comments
Submitted
-
Battle Realms Windows XP Boot Screens (Withot Service Pack)
By nDoroKanjeng in Miscellaneous
The ntoskrnl.exe from Windows XP without installed Service Pack (Non SP) and with installed Service Pack 1 (SP1) or Service Pack 2 (SP2) are not compatible and reverse. This means if you using a wrong, not to your system corresponding ntoskrnl.exe, the Windows XP will hang or crash while booting! Once again, this ntoskrnl.exe is for Windows XP without installed Service Pack (Non SP).
Wrong manipulating on the boot.ini or a wrong ntoskrnl.exe can damage your system and can make it unbootable!
Don't forget to make a backup copy of your boot.ini and ntoskrnl.exe files!
You can use one of the following method. Please read the instructions carefully to install :
<<Method boot.ini>>
1. Extract the ntoskrnl.exe to a directory other than %windir%\system32 (most likely C:\windows\system32 ), for example C:\Temp
2. Rename the ntoskrnl.exe in your C:\Temp directory to another name, in this example to brntoskrnl.exe
3. Move or copy your brntoskrnl.exe from your C:\Temp directory to the %windir%\system32 directory (most likely C:\windows\system32)
4. Modify your boot.ini file by going to the Start Menu / Control Panel / System / Advance tab / Startup and Recovey / Settings button / Edit
or...
Edit boot.ini using notepad. You can find it in the system root (normally C:\)
(note: the boot.ini file normally has hidden and system attributes, open Tools->Folder Options menu in Windows Explorer, select VIEW tab and :
- tick 'Display the contents of system folders'
- tick 'Show hidden files and folders'
- untick 'Hide protected operating system files (Recommended)'
You should now be able to see/open boot.ini using notepad from the system root (C:\) )
5. In the boot.ini file you have to copy the line you use normally use for boot (this is usually the last line, e.g. : 'multi(0)disk(0)rdisk(0)partition(1)\WINDOWS="Microsoft Windows XP Professional" /fastdetect' and paste this copy underneath.
At the end of this new line, add this text: /KERNEL=brntoskrnl.exe (The name "brntoskrnl.exe" should be whatever you renamed the ntoskrnl.exe to when you extracted it to C:\Temp {in step 2})
6. Change the OS name whatever you want, for example:
multi(0)disk(0)rdisk(0)partition(1)\WINDOWS="Microsoft Windows XP Professional" /fastdetect /KERNEL=brntoskrnl.exe
becomes...
multi(0)disk(0)rdisk(0)partition(1)\WINDOWS="Microsoft Windows XP Battle Realms Edition" /fastdetect /KERNEL=brntoskrnl.exe
Example of the modified boot.ini :
[boot loader]
timeout=30
default=multi(0)disk(0)rdisk(0)partition(1)\WINDOWS
[operating systems]
multi(0)disk(0)rdisk(0)partition(1)\WINDOWS="Microsoft Windows XP Professional" /fastdetect
multi(0)disk(0)rdisk(0)partition(1)\WINDOWS="Microsoft Windows XP Battle Realms Edition" /fastdetect /KERNEL=brntoskrnl.exe
7. Save and exit the boot.ini file
8. Reboot your computer and you should get an option as to which OS you wish to boot into, "Microsoft Windows XP Professional" and "Microsoft Windows XP Battle Realms Edition"
9. Done!!!
<<Method Save Mode>>
1. Reboot your computer into Safe Mode (press F8 continuously before the loading of Windows XP until a multi-boot Screen appear then select Safe Mode as your choice)
2. Overwrite the file %windir%\system32\ntoskrnl.exe (most likely C:\windows\system32\ntoskrnl.exe), which should have been backed up, with the extracted ntoskrnl.exe
3. Reboot your computer as you normally would and you should see the boot picture of Battle Realms while loading of Windows XP
4. Done!!!
Disclaimer :
I'm not responsibility for any damage and resulting problems of your manipulations. Use this boot screens at your own risk!
135 downloads
0 comments
Submitted
-
BR - WOTW Windows XP Logon Screen
By nDoroKanjeng in Miscellaneous
Please follow these simply instructions to install :
1. Backup (copy) the file %windir%system32logonui.exe (most likely C:windowssystem32logonui.exe)
2. Reboot your computer into Safe Mode (press F8 continuously before the loading of Windows XP until a multi-boot Screen appear then select Safe Mode as your choice)
3. Overwrite the file %windir%system32logonui.exe (which should have been backed up) with the extracted logonui.exe
4. Reboot your computer as you normally would
5. Done!!!
361 downloads
0 comments
Submitted
-
Battle Realms Windows XP Logon Screen
By nDoroKanjeng in Miscellaneous
Please follow these simply instructions to install :
1. Backup (copy) the file %windir%system32logonui.exe (most likely C:windowssystem32logonui.exe)
2. Reboot your computer into Safe Mode (press F8 continuously before the loading of Windows XP until a multi-boot Screen appear then select Safe Mode as your choice)
3. Overwrite the file %windir%system32logonui.exe (which should have been backed up) with the extracted logonui.exe
4. Reboot your computer as you normally would
5. Done!!!
250 downloads
0 comments
Submitted
-
BR Wolf Clan WinAmp Classic Skin
By nDoroKanjeng in Miscellaneous
For WinAmp user, check this out...
How to install :
Just put this skin to your Winamp Skin directory (most likely C:Program FilesWinampSkins).
Have fun...
204 downloads
0 comments
Submitted
-
Battle Realms Screen Saver
By nDoroKanjeng in Miscellaneous
Just extract this ssbattlerealms.rar then run SSBATTLEREALMS.exe.
Done!!!
858 downloads
0 comments
Submitted
-
Skull Island
By nDoroKanjeng in Maps
Skull Island
Max player : 4
Map size : 384 x 384
Don't U ever wish to find King Kong here . That creature is unavailable, so the wild wolves stand for...
252 downloads
-
Krakatau
By nDoroKanjeng in Maps
4 player.
Enough rice & water, but hard to collect.
Building placement not too large.
243 downloads
-
Indonesia
By nDoroKanjeng in Maps
5 player.
Miniatur map of my country, but not in true scale & not in true condition. This is just my imagintion.
334 downloads
-
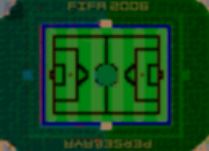
Football Court
By nDoroKanjeng in Maps
1 vs 1 player.
Very close & face to face.
Celebrate the year of football party 2006!
386 downloads
-
Belum Ada Judul
By nDoroKanjeng in Maps
4 max player.
Only one way out available for every base.
Near from rice harvest center but far from water gather point.
Hint :
Use Wolf Clan to finish this game easily.
For other clan, find possible place to build peasant hut near water gather point. Be careful with wild wolf which guard the lake.
273 downloads
(0 reviews)0 comments
Submitted